|
|
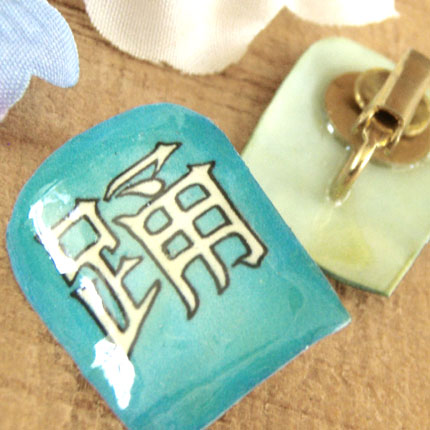
Somehow life went going in other directions last year (yes, my Etsy jewelry supplies shop) and somehow a year has slipped by!
But you know, I’m not willing to let Paper Jewels slip away. I still love the idea of paper jewelry, if it’s made strong and durable – and mine is. It’s eco-friendly, which I love. And it is – sometimes anyway – original and interesting and different. And comfortable (I’m real fond of comfortable).
I like that it’s a little different. Apparently my customers do too – even with my shop on the back burner, I’m getting inquiries lately for custom work. Christmas presents, maybe?
So: let’s do this. Paper jewelry. It’s fun. It’s more expensive than my glass jewelry because, hello, takes a week to finish (and the glass gemstone work takes, hmm, fifteen minutes). And I’m doing a lot of new work these days. Stay tuned 🙂
P.S. No, it’s not related, and I’m not baseball obsessed, really, even though I do seem to keep mentioning it. But. The Cubbies! They won the Series! You don’t even have to be a baseball fan to love this. I’ll shut up about this now, really. But I mean. The Cubbies!
You know that being eco friendly – more eco friendly – is a goal of mine. I think a lot of people are leaning this way. We don’t want to give up our creature comforts or standard of living – but we want to be kinder to the planet. Saving money is nice, too.

This air freshener is a great way to do that. The recipe is from Country Living and of course you’ll find tons of great tips over there.
But this one is so simple! Simmer orange peels (or lemon slices) with rosemary in a pot of water. And if you don’t have the rosemary, just orange peels. One of the freshest, cleanest, loveliest scents on the planet!
Okay, I might be biased – I love the smell of oranges. But it works. Trust me 🙂
This is such an exciting possibility! I just read an article on GrindTV – via Yahoo that highlights the development of roadways that generate electricity.
One movement is taking place in the Netherlands – they’re testing bike paths that are safe, well-lighted, and create electricity too. And in the U.S., Solar Roadways is building prototype roadways – and parking lots – that generate power.
This is the direction we need to go – and it’s being developed even as we speak. So totally exciting!
Whichever one that is. The next one. And this is basically an inspiration pic.

For one thing, these are pretty. But more importantly – well, sort of importantly – you can adapt this idea in a zillion ways, most of which have already occurred to you because you are a smart cookie 🙂
Go to your fave thrift store. Buy the cheapest baskets that can be stacked, or have handles, or fit whatever nook you’re going to put them in. Stop at the hardware store on the way home and buy some spray paint – or raid your craft closet. Spray the baskets (outside if you can, because fumes).
Voila: storage that can hide clutter – and organize stuff. That can be tailored to any spot in your house, to hold whatever you need to stash.
And hey, you can adapt this idea – of course – to cardboard boxes. See, now we’re even talking about recycling and adapting paper because, you know, Paper Jewels 😉
Now this is fashion at its finest. A beautiful woman, and a gorgeous gown:
 I spotted this gorgeous creation (I meant the dress but hey, Gisele too) on Yahoo’s weekly “Too Hot to Handle” photo feature spotlighting celebrities who look great, or who are promoting something Yahoo’s invested in, or whatever. But this one is totally on the mark. Gisele looks great. The dress is fab. And according to the text, the gown is a “100% sustainable Prophetik hemp gown”.
We need to see more from Prophetik, and more of these gorgeous dresses, and does anybody want to guess why we haven’t seen more hemp products in, like, ever? Oh? because the right wing doesn’t want us to grow pot…er, hemp (no, it is not always the same thing) because they can’t make any money off it, if we do? And still we can go online to find certain products, such as Nanocraftcbd.Com Latest Products that specialize in selling all these products.
Pfft. Hemp is sustainable. The dress is beautiful. What’s not to love?
I am determined to bring some order around here. I am. One way or another. Anyway, while I was thinking about it (instead of doing it) I started looking for ideas for drawer organizers. I’ve seen some great ones at the Container Store, etc., but I hate to spend money when I can do it myself. I just needed to focus.
And then I found a fabulous tutorial:

DIY Drawer Organizer
Aren’t they great? The wonderful tutorial is from The Stonybrookhouse Blog and she has terrific step-by-step instructions.
And a ton of other useful posts, too. Um… you might want to check out the pumpkin brownies. Just sayin 🙂
This is a super easy do-it-yourself project – and an inspiration for more ideas, too. I found this over on Pinterest. And if you think I am totally in love with Pinterest, you are right! I’ve linked to Liina O’s “Homemade” page and she has found tons of good ideas, go peek!
As shown here, this is a fun, decorative bowl:

This cute bowl would be a great accent in the family room, and a fun project to do with the kids. But, I do have to add, it could be a little time-consuming. Rolling up the magazine pages (gluing them maybe?), then cutting them – that could take a bit of patience.
So what I’m proposing is adopting the idea. Blow a balloon up to a nice chubby round shape. Use thinned glue or wallpaper paste, to apply torn strips of magazine pages, old brown paper bags, or newspaper pages, onto the surface. Keep layering them. (Note: the wallpaper paste could be flour-and-water, super cheap and non toxic).
Keep layering the torn strips. When the surface looks good to you, and there are enough strips of paper on there to be fairly sturdy, I’d apply polyurethane to make it waterproof. Add a couple layers.
Then bust the balloon. Voila! A strong-ish container that could be a vase (if you’ve waterproofed the inside, too) – or a toy holder (make the opening at the top really big, for that one) – or a place for the kids to keep all their pens and markers (make that one small) – and, well, you get the idea.
The colors that work in your house, a shape you like, a project that you and the kids can do together – and a way for them to see that THEY can make things that work. Love it!
So today I’m talking paper again – and a couple home-made gift wrap ideas I think will offer you some inspiration.

Do It yourself Gift Wrap Idea Number One
I love this one! You could use a store-bought doily, and that would be lovely over kraft paper, or fabric, or a plain box. Or instead of a doily, cut out a snowflake like you used to do when you were a kid (basically fold a piece of paper over and over and then cut out various shapes, and then unfold). Use a piece of colored or patterned paper and you’ll have wonderful homemade ‘lace’ like this one. It looks wonderful, and it doesn’t cost much (or anything, if you use old magazine pages or whatever you have around the house) – and it’s fun and individual.
and

Do It yourself Gift Wrap Idea Second Version
Now that is fun! Take any gift box, or a cereal box turned inside out, or a recycled box rescued from your local UPS store or printer. Find some markers or sharpies or paint brushes in your craft cupboard – and draw some pictures! If you have to paint or draw over some printing already on the box, so what? That could make it even more fun. If you’re not a great artist – so what? Draw circles or stars or just add scribbles with lots of colors. Ask your kids to draw their favorite pictures. (Okay, maybe put newspapers down on the kitchen table first.)
I’m sorry, Hallmark Corporation or whatever company it is these days that manufactures wrapping paper – but these are much better. They’re ecologically smart, they don’t cost much – and who has bunches of extra cash these days? – and even more important, they’re made with love and they’re PERSONAL.
Isn’t that what gift-giving is supposed to be about?
P.S. Oh! I must give credit where it’s due. I found both of these wrapping ideas – and more yummy ones to explore – over at Going Home to Roost, a wonderful blog full of do it yourself ideas, and recipes, and gentleness and healthy ideas and, well, it’s a lovely blog you ought to read.
Do it yourself paper flowers – take a look at how wonderful these are!

These lovely blossoms are made from maps, or old book pages, or (I would think) any colorful paper / pages that need a new life. I found this wonderful idea over at Apartment Therapy which you know is one of my absolute favorite ideas-source. The article there even links to a tutorial!
And even better – if you love these flowers but don’t want to make them yourself – they also give the source of this yummy recycled goodness: and it’s an Etsy shop!
The shop is Greencycle Designs and she has wonderful work over there. Whether or not you decide to tackle making your own flowers (remember to use recycled pages!) you definitely want to go check out her shop, her prices are very reasonable and her work is gorgeous.
This is a win-win all the way around. Paper (which of course I love) and recycled – and Etsy – and do it yourself – wow!
I’m always peeking at the recycled-and-upcycled offerings over on Etsy – and today I found this great looking pendant light.

It’s made from a colander! And a lot of careful craftsmanship.
Look at all the positives: it’s recycled (a colander!). This could have gone in a landfill – and it shouldn’t have – and it didn’t. It’s handmade, which is always a good thing. (There’s enough big box stuff out there already). It uses the new energy-efficient CFL bulbs. It’s unique. It’s affordable – a pendant lamp for your place and even with the shipping, it’s only $55? Oh yeah, this is of the good.
And of course the most important thing – it LOOKS GOOD.
It’s available from SpokenStitch on Etsy – go over there and take a look, they’ve got lots of goodies, both recycled and handmade. Totally worth checking it out!
Think how great this would look in a loft space. Or a farmhouse kitchen. Or over your dining room table. (Or mine!)
You get the idea I like this lamp? I really really do 🙂
|
Coolness
DIY
Eco friendly
Gardening
Home Decor
Indie / Design
Thrifty
vintage
|

