Tutorial – Make Gift Bags – DIY

This is such a useful tutorial! I found it over at How About Orange Blogfrom Jessica Jones. She’s got tons of useful ideas over there. With her super clear pics and instructions, she teaches us how to make gift bags – from newspaper!

Tutorial - gift bag from newspaper - DIY
Gift Bag from Newspaper – Tutorial
.

And of course one of the nice things is that you can use any paper (no, it doesn’t matter if there are folds or creases). Talk about saving money – and giving a gift where even the wrapping is special!

and did I say “saving money”? Hallmark will have to manage without our $$, thank you very much.

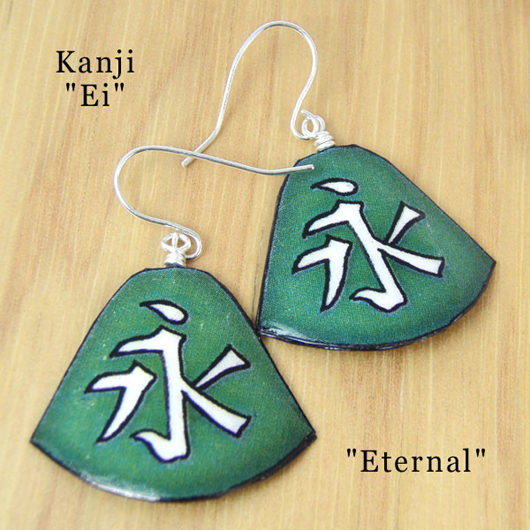
Green Paper Earrings – the Kanji says Eternal

It occurred to me as I was writing the title of this post that “green paper earrings” has more than one meaning.

The color is green, that’s the most obvious of course. But the materials are also green – as in eco friendly and non damaging to the planet. Also very sustainable. I use recycled paper for the inner layers of Paper Jewels – as well as for the padding inside my bubble wrap mailing envelopes. And I use post-consumer white recycled paper even for the ‘face’ of the earrings – it costs a bit more but of course it’s worth it.

Here’s my new design:

Japanese Kanji Ei or Eternal Green Paper Earrings

The Japanese kanji says “Ei”, or “Eternal”. And of course they can be made in other colors – her favorite, for instance!

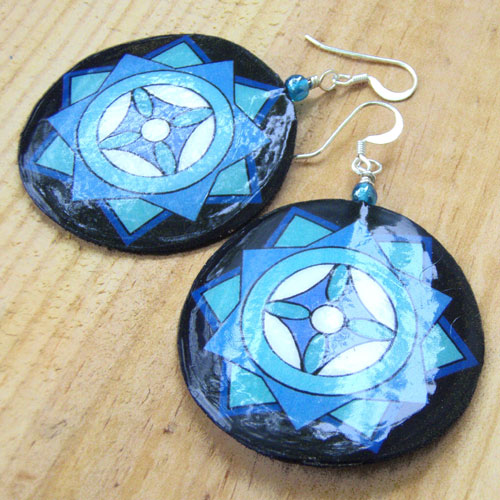
Kaleidoscope Big Lightweight Paper Earrings

Okay, maybe kaleidoscope. Or mandala (that’s what I first thought). Or even “snowflake” (remember the snowflakes we used to cut out as kids?) – that’s what these new earrings remind me of.

Big Lightweight Blue and Black Mandala Snowflake Earrings

They’re big, colorful, and lightweight earrings – lacquered paper, with a bit of curve and a lot of shine. And available in custom colors, of course.

Just for fun 🙂

Valentine’s Day crafts – Plate Decoration Revisited

Remember the white plate (with a recipe!) I blogged about recently? It’s here. The idea was to write a recipe on the plate, bake it, and voila! Permanent decoration. Well I have been seeing this idea more and more lately – and I wanted to share one more example because it’s so charming – and timely 🙂

Decorate a Plate - Valentine's Day DIY Craft

What a darling idea for a Valentine’s Day craft that everyone will love! I found it at It’s Overflowing – overflowing with creativity, that is!

You might want to check out her Tips pages, too – she’s got some really useful ideas there. “How to remove sticky stuff” and “An easy way to hang art” and “DIY Microwave popcorn” (you know that one’s going to be used!)

Very cool blog. And I do love that plate idea!

White Flowers – or Pom Poms – Totally DIY

And gorgeous. Take a look at these – “pom pom flowers”, they’re called. I think they’re ethereal and beautiful!

DIY White Pom Pom Flowers

And they’re made with wax paper! This is what DIY is all about, or should be. Taking something ordinary – wax paper! – and with minimal skill (but a lot of imagination, thank you Marichelle from Nice Package Blog!) – something completely different is created.

You can find the tutorial here, at the Nice Package Blog. It’s not hard at all and her pics are wonderfully clear.

And come on – aren’t these flowers wonderful?

P.S. And why couldn’t these be a wonderful decoration for your wedding? They LOOK like wedding flowers!
P.P.S. When you visit Nice Package Blog you’re going to find more wonderful ideas. Go look, you’ll thank me for it!

Decorative Paper Bowl – DIY Inspiration Project

This is a super easy do-it-yourself project – and an inspiration for more ideas, too. I found this over on Pinterest. And if you think I am totally in love with Pinterest, you are right! I’ve linked to Liina O’s “Homemade” page and she has found tons of good ideas, go peek!

As shown here, this is a fun, decorative bowl:

DIY project Decorative Paper Bowl from magazine pages

This cute bowl would be a great accent in the family room, and a fun project to do with the kids. But, I do have to add, it could be a little time-consuming. Rolling up the magazine pages (gluing them maybe?), then cutting them – that could take a bit of patience.

So what I’m proposing is adopting the idea. Blow a balloon up to a nice chubby round shape. Use thinned glue or wallpaper paste, to apply torn strips of magazine pages, old brown paper bags, or newspaper pages, onto the surface. Keep layering them. (Note: the wallpaper paste could be flour-and-water, super cheap and non toxic).

Keep layering the torn strips. When the surface looks good to you, and there are enough strips of paper on there to be fairly sturdy, I’d apply polyurethane to make it waterproof. Add a couple layers.

Then bust the balloon. Voila! A strong-ish container that could be a vase (if you’ve waterproofed the inside, too) – or a toy holder (make the opening at the top really big, for that one) – or a place for the kids to keep all their pens and markers (make that one small) – and, well, you get the idea.

The colors that work in your house, a shape you like, a project that you and the kids can do together – and a way for them to see that THEY can make things that work. Love it!

Tutorial for Kraft Paper Flowers – Terrific DIY

You are going to love this – I found a wonderful, clear, easy-to-follow tutorial for making your own paper flowers. Take a look at these gorgeous decorative petals!


As shown in her tutorial, these are made with brown paper bags! And I really like the natural-paper look. But also – think how you could personalize these! Color paper, magazine pages, you name it. Your imagination’s really the limit here – and it’s practically cost free.

Or, use a pretty white textured paper – talk about DIY (and beautiful) wedding decorations!

The wonderful blog where I found this excellent tutorial is A Place For Us and she has some wonderful, charming, thought-provoking, useful posts there – it’s totally worth your time.

Do I sound like I’m really enthusiastic about this one? You’re right. This is a great find. Make some flowers – and check out that blog!

Personalized Gift DIY Idea

I saw this idea over on Pinterest and fell in love. Take any plain dish – and turn it into a personal gift or work of art 🙂

do it yourself - permanent marker on a plate
 

Actually I think the one in the pic has poetry written on it – or it might be Edgar Allen Poe (The Raven?). But no matter.  Buy a simple plate at the thrift shop. Write your favorite muffin recipe around the edge using a Sharpie.

Then bake the plate for 30 minutes at 150 degrees in your oven (or more – I’ll doublecheck on that). Presto! The writing is permanent.

Then bake the muffins, load the plate up, and take them to your sweetie or favorite neighbor as a gift.  You get to show off, you get to play with a new art form, and your sweetie gets his (or your) favorite  muffins.  This is a win!

P.S. And of course, what a darling way to make a personalized gift for someone special. An anniversary gift for your fave couple – with their names and wedding date. A birthday gift for your mom with a quote she loves. You get the idea!

P.P.S. Oops! I almost forgot to give credit! I couldn’t find the original source – but it was first pinned by the beautiful Marissa Villasana on her ‘Crafty’ page – and she has some wonderful ideas over there to check out!